Friday, May 1, 2015

Braies

Simply put, braies are medieval boxer shorts. Braies would have been constructed from linen and typically would have been undyed or bleached white. Combined with a linen shirt, braies would have comprised a linen base layer that would have been more comfortable to wear against the skin than wool and which would have been more easily washed. Neither of these garments were found intact on the Bocksten man, however linen tends to be more susceptible to rotting than wool or leather, and so it is reasonably likely that these garments rotted away. It is also possible that the Bocksten man was not wearing a linen underlayer, however there is plenty of evidence from other sources to indicate that such garments existed and were worn.

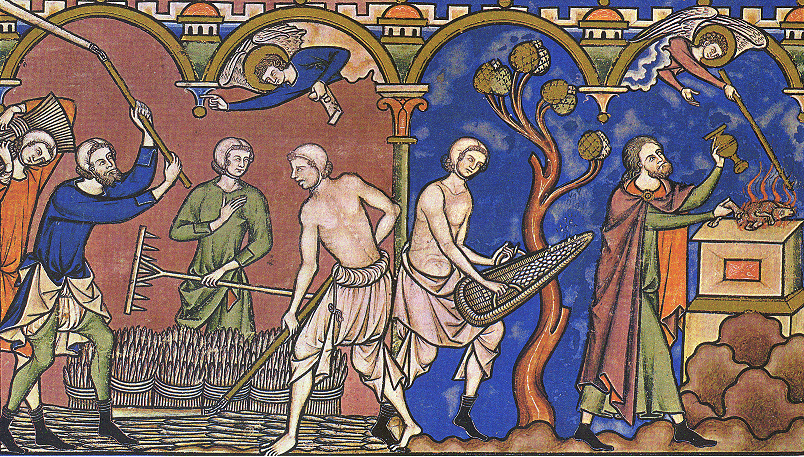
Farm workers wearing only their braies. Image from the Maciejowski Bible, a 13th century manuscript.


Wool or linen chausses would have been used to cover the foot and lower leg and would have been pulled over top of the bottom edge of braies such that the entire leg was covered. These chausses would have been tied to a belt at the waist that may or may not have been part of the braies.

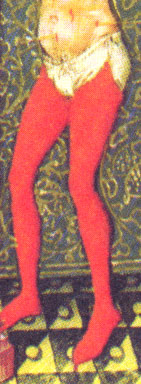
Braies and Chausses tied at the waist band.


There is some debate concerning the appropriate method of constructing braies and over whether they were a pair of sewn "pants" or whether they were actually accomplished by simply cloth wrappings, similar to the undergarments worn by ancient Romans. Accomplishing such cloth wrapped braies is rather simple, as it involves the creation of a single rectangle of fabric approximately 60" x 40"-50" which is conveniently about 1.5 yards of linen fabric. This cloth rectangle is then wrapped around the body and rolled over a belt. The link below provides a picture tutorial along with instructions (that appear in Swedish and English). Getting the exact measurements probably takes a little playing with the wrapping process and a little practice, but once you've figured it out, making this style of braies is as simple as cutting the fabric to size and finishing any raw edges by rolling the fabric over twice and stitching into place.


Cloth Wrap Braies


Braies can also be sewn together to form a pair of short pants as we might think of them modernly. This site: sewn braies provides images of several types of braies along with the patterns for making them. Their recommended pattern shown below is essentially a rectangle for each leg and a square gusset in the crotch. You might slightly improve this pattern by adding about two inches in length to each of the leg pieces and then rolling the waist band back over itself to form a channel for a waist band.


Striking a Balance: Buy it, Make it, Trade it

Getting started in a reenactment organization can be a daunting task. Putting a complete kit together often requires a newcomer to not only acquire clothing, but also accessories such as shoes and belts, armor, weapons, camping gear, etc. One of the strengths of the SCA is its relatively low bar for entry (an attempt at medieval clothing). Likewise, the SCA is in many ways an organization for people who make things, and so many newcomers will find plenty of people who are quite willing to help them learn to make their own equipment. Unfortunately, this attitude sometimes results in a lot of pressure for newcomers to make all of their stuff. It seems obvious that making things yourself is cheaper than buying them and likewise, that this would lead a website that is geared towards helping newcomers put together their first kit on the cheap to also support this line of reasoning. However, the reality is not nearly this simple and in many cases it is far better for people to simply buy some or even all of the gear that they need.

Why would this be the case?

Well, for starters, we need to recall a previous post where we discussed that every project must balance time, monetary cost, and quality. As stated before, you can have things good, fast, and cheap: pick two. In the case of the imaginary newcomer that this site is geared towards helping, we must remember that they do not have an abundance of free time, free cash, or crafting skills. Therefore, if we focus solely on reducing monetary costs, then we must either expect to spend a lot of time making things or we must choose to make low quality stuff. In general, this series tries to balance these two things. Certainly making things requires some amount of time. This is kept to a minimum by keeping things simple (one form of reducing quality). However, sometimes making things isn't really an option. This may be because the piece of equipment is complicated, takes specialized skills, and sometimes it's because you can't buy the materials for the price of buying it.

When should we make things?
1) When we want to: Doing things is kinda the point of the SCA, and crafting can be incredibly rewarding. If a particular craft is something you're interested in and if an item is something that you want to make, it may be worth prioritizing making the item (at the expense of time and possibly quality). Certainly, however we must temper our choices with a solid dose of reality. It is certainly feasible for your first garb project to be a full Elizabethan gown, but given how complicated such a garment is, you would need to be realistic that either the project won't turn out very well or it will take an extraordinary amount of time (while you essentially learn how to sew). Keep your early projects simple and work towards projects that your skills will allow you to successfully complete in a reasonable time frame. Remember, you're going to want your gear sooner rather than later.

2) When we don't hate doing so, and:

- Buying is too expensive: If your budget is really small, you don't really have many other options than to make things yourself. At the extreme end, it may be worth considering whether the SCA is a hobby that you can afford at all. Ultimately hobbies are luxury items, and if you're making a choice between eating this month and buying fabric for a tunic, your priorities need to be reevaluated. Even making things yourself has a cost (materials, tools, instruction, time), and while the SCA tends to extol the virtues of upcycling, recycling, and repurposing mundane objects and materials, the reality is that doings so is actually fairly difficult and requires a skilled craftsperson, not a novice to pull off well.

- It can't be bought: Simply put, some personas are more popular than others. Merchants tend to have those personas covered pretty well, so if you're looking for viking or 14th century stuff, it's almost certainly available for purchase somewhere (and it's probably better than you'll make on your first attempt). However, SCAdians like to be different, and for many people, this expresses itself in their choice of persona. If you're trying to be something less popular, however, you might not be able to buy the gear you need to complete your kit. From the perspective of keeping costs down, an important consideration is to choose a persona that is popular so that you can benefit from the myriad of freely available research, inexpensive "starter"-level gear, and crafting help.

- It's a group project: Sometimes local groups get together to make a whole bunch of a particular gear. Shoulder bags, coifs, veils, and banners are popular choices, but entire outfits and even armor are sometimes built as a group activity. You should try to take advantage of these opportunities to make things even if you aren't very experienced or aren't particularly keen on that form of crafting in general, as the group atmosphere can make things more enjoyable, and making things as a group tends to mean that expertise, tools, and materials will be available for free/cheap.

When should we buy things?

1) If you dislike making things: Seriously, if you absolutely hate sewing, just plan on buying your clothes. It isn't really worth the stress, aggravation, etc and you're reasonably likely to be happier with the final product made by someone who 1) has experience making things and 2) doesn't hate it. Remember that your time has value, and if you're spending your time doing something you hate, you may as well just get an extra part-time job. Of course, this approach requires us to make compromises. One of the big ones is that you're likely going to be limited in the period of clothing that you can accomplish without spending a bunch of money. Clothing gets increasingly complicated starting around 1350, and much of the later clothing requires an individual fit, which makes buying clothes off the rack difficult and expensive. At the same time, earlier medieval clothing is fairly simple, isn't personally tailored, and is relatively inexpensive to purchase.

2) If you don't have time to make things: Obviously if time is your limiting factor rather than cash, by all means, just buy what you need. There are a few variations on this, however. For instance, if you're spending your time sewing your clothes, you might elect to simply purchase a belt and/or pouch because you don't have time to learn an additional crafting skill. You also might find that some tasks aren't really worth your time. For instance, my wife does tablet weaving and offered to make black twill tape for use as trim on a pair of pants that I'm planning. However, she has plenty of other projects on her schedule and the twill tape itself is fairly cheap to just buy, so it probably isn't worth it for her to weave it by hand. Similarly, many medieval notions can be made (hooks and eyes, buttons, lacing cords), but sometimes it might just be worth buying, as these are often cheaper than the time-cost of making them. This also has particular relevance to newcomers. As you are putting your first kit together, you, by definition, don't have things to wear in the mean-time. If a project is going to take you months to complete, you might find that buying it is a better option so that you have it now rather than later.

3) If you lack the necessary skills/tools: To a certain extent, it is expected that you can learn quite a bit by attempting to make things, but some projects are more complicated than others. Basic sewing and armoring projects can be carried out using fairly minimal tools and without much previous skill, but putting together a full suit of plate armor requires quite a bit of time, skill, and certain specialized tools that probably end up costing more than the armor itself. It is important to be realistic about what skills you can acquire given your resources (are you teaching yourself, or do you have an instructor?) and time-frame (Can you wait 5 years to get into your first garb?).

4) If it's not worth it: Sometimes you'll find that buying something is cheaper than buying the materials or you'll find that the difference in cost between the finished product and the materials is so small that it's just worth buying it. Similarly, if something takes a lot of skill to make and can be bought rather cheaply, it's worth just buying. Consider shoes. Shoes are usually made of leather and often require several different types/thicknesses of leather. Leatherworking requires some tools certainly, but leather is often only sold in full hides, so a single pair of shoes might require you to buy $300 worth of leather, even though you'll only use a little bit of it. Furthermore, you'll expect to pay about $8-10/square foot for the leather, and a pair of shoes uses 5-6 square feet. If you consider this material cost and compare it to the cost of purchasing period shoes (about $75), you'll see that 1) You have to buy a lot more materials than you'll need at significant cost and 2) There isn't much savings from making it yourself. Finally, shoes are a bit tricky, and if you don't get a good fit, you'll end up in quite a bit of pain. Coming up with a good pattern for your feet will waste quite a bit of materials as well (good thing you got a whole hide). Because of this, you'll typically find that it isn't worth the hassle of making your own shoes.

What about barter?

SCA members often suggest barter as a way of keeping costs low, but on the face of it, this isn't necessarily a feasible plan for newcomers. For starters, there's often the assumption that the parties are exchanging goods that they have created, for instance, trading leatherwork for clothing. However, our proverbial newcomer doesn't necessarily have other skills with which to make things either, so they can't trade a belt for a tunic, because they don't know how to make either. That being said, bartering labor for gear may be a reasonable task. This labor may not be in the context of the SCA. You might find that someone's willing to make you clothing in exchange for mowing their lawn, cleaning their gutters, etc. Similarly, there are lots of camping events, and often people are willing to trade garb, armor, a place to sleep, etc for people to cook meals, wash dishes, setup and tear down tents, and watch their kids. At major wars, there are even merchants who hire people to man their booth who provide clothing, meals, etc to the people who work for them. These arrangements ultimately are on an ad hoc basis, however, so there's nowhere I can point you to in order to find them. You'll have to ask around on your own.
Saturday, November 8, 2014

Where to buy stuff on a budget:

Where to buy stuff on a budget:

Sometimes it is better to just buy the things we need for our kits. I have provided an annotated listing of merchants and products that I think strike a good balance between quality, authenticity, and price below. 

Armor:

Starter Helmets:


These three starter helms are essentially equivalent. All 3 options are reasonable for the mid-14th century kit that I recommend for garb and armor on a budget. Your decision probably comes down to wanting a bar grill vs. the face plate that is on the Blackbird Armory helm. Obviously Accdntprone's ordering is a little more complicated (you need to send him a personal message), but as far as I can tell from reviews, he makes a good, solid helm. If you're looking for an earlier period helm (spangenhelm), I think Accdntprone also offers those as starter helms. 

Other Armor:


The Armour Archive is the #1 go-to place for armour questions, buying armor online, etc. The forum has plenty of armour for sale, reviews of armourers, etc.

Mad Matt has a good reputation on the Archive, and offers a good mix of inexpensive armor pieces and much pricier custom work.

Rough From the Hammer specializes in selling pre-formed armor parts. The parts are left unfinished, which means that you'll ultimately need to do the final polishing, strapping, etc yourself. 

Greaves (lower leg protection): Field Hockey Shin Guards

Greaves aren't required armor for SCA combat, but they can be a really good idea. The lower leg and calf has a fairly complex shape that makes steel armor greaves fairly pricy. Likewise, trying to form your own plastic greaves is also somewhat difficult. Some people use soccer shin guards, as these are a readily available commercial product, however they tend to be somewhat bulky. Field hockey shin guards like these, however are very low-profile.

Fencing Gear:

Masks:

The most important thing you need to pay attention to is the sizing. You should make sure you get a mask that fits (which is to say it should probably be tighter than you think it should). 

Zen Warrior Armory makes really good fencing masks. You might notice I didn't list their cheapest mask, and that's because I think that having a stainless steel mask with a tighter weave is worth the extra money.

The Darkwood masks seem reasonably sturdy. They're priced pretty cheap for a stainless steel mask. All around, they're probably a solid choice.

Both merchants offer a rigid back of head protector for their masks (for Cut & Thrust). Ultimately, if I were just starting out, I'd probably just buy whichever one allowed me to combine shipping with other items.


Gloves:

The Darkwood Armory gloves wear pretty well and at $30 are cheaper than most of the other fencing gloves available. Alternatively, you can use a pair of TIG welding gloves, since they're rather supple and thin to provide manual dexterity. Try to find a pair that is all leather. Any logos or emblems can usually be removed with acetone or rubbing alcohol with a little effort. 


Hoods:

Both of these hoods should be completely fine. I'd list Zen Warrior Armory, but theirs are cotton and quite thick, which makes them pretty warm compared to the hemp or linen ones listed here. 


Gorgets:

Zen Warrior Armory seems to offer the cheapest gorgets that I've been able to find and they provide good protection for fencing. We have a number of them in our loaner gear and they hold up well to the hard usage they get there.

I don't own nor have I seen any of the Anshelm gorgets in person, however, my gorget is made in that style, and I find that it is a bit more comfortable to fight in. Anshelm's price on these ($75) is pretty good, as I can't find anybody else who is selling these for less than $90.


Swords:

Without explaining in detail, my recommendation at this point for new fencers is to save their money and buy the Darkwood Armory sword first. My experience is that fencers who get reasonably involved in SCA rapier ultimately purchase a DW blade within 2 years, even if they bought another sword first, so why not save up a bit more money and buy the DW?

As far as the price difference, I think ZWA's swords are actually selling for more money than the website suggests (based on my recollection of prices from Pennsic), so I think they come in closer to about $250-$275. I recommend either the R6 or the R9 swept hilt guards, and probably the 40" long sword (which is the longest they offer) with the heavier pommel that is recommended on the website.

As far as Darkwood armory's swords go, pay the extra $10 and get the bated rapier blade rather than the practice blade. You'll probably want either the 42" blade or the 45" blade (if you're around 6' or taller). 


Accessories:

Shoes:
Boots by Bohemond - Shoes and Boots from various periods

Both of the above merchants provide reasonable reproduction shoes. They also both provide various other accessories such as knives, belts, leather pouches, etc. Bohemond's shoes are of higher quality, but I own shoes from both sources and they have all lasted for several years of heavy use (Lilies War & Pennsic + 20ish other events/year). 

I recommend most people purchase the additional rubber 1/8" Vibram non-slip sole to protect your shoes from asphalt and gravel, and to provide a bit more grip than the leather sole provides. I do not recommend purchasing the lugged sole that is available from Viking Leather Crafts. It doesn't look particularly good with the shoes and can provide too much traction for combat sports (which can lead to knee injury). 

Bling (buckles, belt hardware, etc):
Raymond's Quiet Press

I recommend all of these merchants. They all produce good work, do quite a bit of historical research, and provide reasonably priced pieces (and also some really expensive stuff). 

Clothing:


This is far from a complete list, however there are plenty of merchants who offer garb of questionable authenticity for lots and lots of money, so be careful. Revival Clothing and Historic enterprises are essentially the "big boys on the block" so to speak when it comes to buying garb. Their clothes are pretty good, authenticity-wise and they are well constructed. Some in the SCA consider their prices high, but I'd actually say that they offer pretty good bargains considering the amount and level of work that goes into making clothing.

Linen Garb's clothing is fairly basic, and can be used to give a good, generally medieval look. In my opinion, they aren't as authentic as the other merchants, but they're definitely good enough. Their prices are quite reasonable. Ultimately, I think you'll do better trying to build pre 1300's outfits from their garb.

I think I first came across Tailor Made Clothing as a merchant this past Pennsic, but apparently I know a lot of people who wear their clothes (as I know pretty much everybody in the photos). The clothing items pictured are of good quality, and ultimately if the listed prices are accurate, they are under-charging for their work. The downside here is that you'll probably have to wait for your piece to be made, whereas the other three merchants have a sizable inventory, and can probably fill orders immediately.


Fabric:

http://www.bblackandsons.com/ - Wool Fabrics
96 District Fabrics - Linen, Wool, Cotton, Silk - website not yet functional
96 District Fabrics - Facebook Page
Carolina Calicoes - Linen, Wool, Silk, Cotton Fabric
William Booth, Draper
Gray Line Linen

Fabrics-store.com is my usual go-to recommendation for people who are trying to get into linen garb while keeping the price down. Their linens are about $8/yd, which makes them cheaper than most other sources. However, you'll find higher quality linen at 96 District Fabric, JoAnn's, and sometimes at Carolina Calicoes. If you order from Fabrics-store.com, pay attention to their rotating sales, and use the coupon code "ilovelinen" for an additional 7% off.

B. Black & Sons is a great source for all sorts of wool. You'll pay around $20/yd, but their wool is high quality and they have a fairly wide selection of different kinds of wool.

96 District Fabrics and Carolina Calicoes are mainly available at events. Both merchants set up their shops at Pennsic, and they can also be found at big events along the east coast. Unfortunately, they don't seem to have online shopping set up, but you should be able to place an order by contacting them directly. 96 District has good quality fabrics. Their prices are a few dollars higher than fabrics-store.com's prices on linen (around $10/yd if memory serves). Carolina Calicoes is a little more hit-or-miss, as much of their inventory comes from wholesale lots and auctions, which means that it changes over time. They seem to reliably offer linen around $6 or $7/yd. I haven't worked with their linen much, but it seems to be of ok quality. They usually have a reasonable selection of colors available too. Keep an eye out for them at events, because they often have some unique fabrics and sometimes they have some killer deals going.

Both William Booth and Gray line offer higher quality linen. The price is slightly more expensive. William Booth offer offers a selection of twill tapes, trims, and other notions. Just be careful, as the site is geared a little more towards 18th century reenactors, so some products may be a bit out of period.

Trim:

Calontir Trim

Ultimately trim is a bit of a luxury. In order to keep monetary and labor costs down, I won't really offer much discussion on the use of trim to appropriately decorate your garb. However, if you want trim, this is probably your best bet for buying it. They travel extensively, so they may very well pop up at a major event close to you at some point. 

Saturday, March 8, 2014

Mid 14th Century Helmets

Head: Your head is probably the most important thing to protect in SCA combat. First of all, it contains your brain, and that's kind of important (Trust me, I'm a Ph.D. candidate in Neurobiology :-D). Secondly, your face is also located on your head and it's fairly sensitive to being hit and has vulnerable bits like your eyes that help you to see. Thirdly, the way that SCA rattan combat works means that your head is going to be one of the areas that is hit most frequently. Because of this, you want your helmet to be strong and you actually want it to be fairly heavy (at least 10 lbs) as this additional weight will increase the inertia of your head, which will keep your brain from bouncing around in your skull as much. You also want a helmet that is made of sufficiently thick metal to keep it from denting too easily. While thinner material is legal, you should consider 14 gauge mild steel to be the absolute minimum thickness of metal for your helmet, and should probably look for something in 12 gauge steel.

There are 3 main styles of helmet that are appropriate for the mid 14th century.
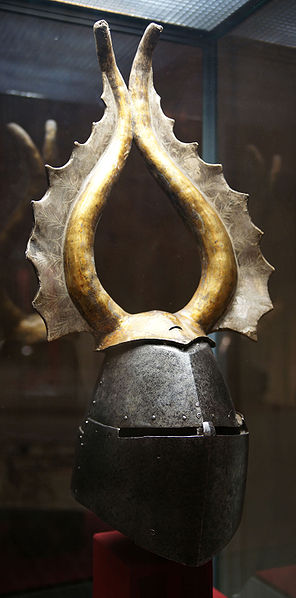
Great Helm of Albert von Prankh,
http://commons.wikimedia.org/wiki/File:KHM_Wien_B_74_-_Great_helm_of_Albert_von_Prankh,_14th_century,_front.jpg

The great helm, would have been going out of style by the mid 14th century, but is simple enough that making one can be accomplished with minimal tools. These have the advantage of looking pretty badass, but typically have poor visibility. Furthermore, the flat surfaces (especially on top) can make this catch shots that would glance off other styles of helm.

 This tutorial is fairly decent and describes how to make this style of helmet: http://www.arador.com/armour/how-to-make-a-great-helm/

So is this one: http://lochcairn.freeservers.com/classes/barrelhelm1.htm

This video: http://www.youtube.com/watch?v=3ASz5eHoiyE and this one: http://www.youtube.com/watch?v=v_TCzalrvTA are also helpful in figuring out how to make one. I 

A kettle helm made by Therion arms (http://therionarms.com/)
The next style of helm is the kettle helm. Historically, kettle helms did not cover the face or the back and sides of the head, but several armorers make kettle helms with bar grills and slats that cover the rest of the head to make them legal for SCA combat. 

A bascinet style helm with a fixed bar grill covering the face from Mad Matt's armory (http://www.madmattsarmory.com/inv_head.php)


Finally, there's the bascinet. This style of helm is probably the most popular in the SCA. It is fairly simple to make, and the conical point makes it good at causing some shots to glance off the surface. The cheapest versions of these are made with a bar grill that is fixed to the helmet itself. More expensive versions have a hinge at the top that allows you to lift the bar grill and potentially swap it out with shaped face plates that are more common in later decades of the 14th century.

In general I recommend buying a helmet unless you have a particular interest in making armor, have access to some metal working tools, and have the time to spend on making one. As far as making one goes, the easiest of these to make is the great helm, as it requires only a few tools and can be riveted together (rather than welded). The other two styles require some more complex metal shaping, a few more tools (that aren't necessarily super expensive), and access to welding. I will address these possibilities in more detail in a future post, but for now my recommendation is to find an inexpensive "starter" bascinet style helm with a fixed bar grill. These typically run around $150 - $300 depending on some options.

Mad Matt's Armory offers several great helms, kettle helms, and bascinets at a reasonable price: http://www.madmattsarmory.com/inv_head.php

Iron Monger's munition's grade bascinet is a decent choice: http://ironmongerarmory.com/stock-helms

Helms are frequently for sale on the Armour Archive: http://forums.armourarchive.org/phpBB3/viewforum.php?f=3

Monday, November 18, 2013

Mid 14th Century Armor

I have chosen the mid 14th century as the time period for the first set of tutorials for the SCA on a Budget series largely because of the armor of that period. While mid 14th century clothing is simpler than the clothing of later time periods, it is not any simpler than clothing from earlier time periods. In contrast, the armor of the mid 14th century is more complicated than the armor of earlier time periods, which might lead you to wonder why I chose that period as a starting place for my tutorials. The answer is fairly straightforward, which is that the armor of earlier time periods does not meet the minimum armor standards for SCA rattan combat. Furthermore, the armor of the mid 14th century is far simpler than the armor that comes even a few decades later. Because of this, the mid 14th century is a "sweet spot" in medieval history where the historic armor is sufficient to meet SCA armor standards, but is simple enough to be made by novices with limited tools and metalworking experience. Ideally my focus will be around 1351 which would make the armor perfectly suited to the Combat of the Thirty (CotT), a special type of melee that occurs at large events like Pennsic

So, what would a mid-14th century knight or man-at-arms wear into battle?

I urge you to first watch this video titled "How a man shall be armed" which has been prepared by La Belle Compagnie, a Hundred Years' War reenacting group that has done some remarkable research. The armor that we will be making will be most similar to the armor worn by the man on the left from 1337, the start of the Hundred Years' War.


Helmet: Nothing says medieval armor like an awesome helmet. For the mid 14th century, you have a few options. If you are planning on making the helm yourself, the simplest option is to make a great helm. By the mid 14th century, the great helm was going out of fashion, but they could still be seen on the field. Great helms have the main advantage of being simple and requiring minimal tools to make. They also look pretty cool. However, they have the disadvantage of having limited visibility and of presenting flat striking surfaces (not all of them do this). An example of a nice great helm is worn by the fighter who is facing us in the first image of this forum thread: http://forums.armourarchive.org/phpBB3/viewtopic.php?f=14&t=85680.

The most popular style of helm is the bascinet, which is seen in the video linked above. These were initially worn underneath great helms, but ultimately they developed into a helmet of their own. They initially did not have any form of face protection, but visors and nasals developed quickly afterwards. In the SCA these are often made as a fairly cheap starter helmet and face protection is carried out by welding steel bars together to make a "basket" for the face. As far as making these yourself, they aren't terribly difficult, but do require some more tools than the great helm, are a little more difficult to shape, and require access to welding equipment. If you are going to buy a helmet, this is probably your best bet.

A third option is the kettle helm. I won't go into much detail about them, but essentially they are a steel wide-brimmed hat. Medieval kettle helms lacked face or side protection, but SCA versions typically include a bar grill and some metal slats to met the minimum armor standards. These are about the same difficulty to make as a bascinet, but have a few more pieces, so they're a bit more expensive to buy.

Choosing between these helm styles will largely be a question of aesthetics. In general, I recommend simply buying your helmet, as making your own requires some metalworking skill, access to materials and tools, and will take a relatively long time to complete on your own.

Padding: The first layer of any armor is typically padding that serves to cushion the body against blows, provide a place to attach other pieces of armor, and make wearing armor more comfortable. Typically padding was made from cloth, with a natural undyed or bleached linen outer shell that is padded by either stuffing some form of material into channels stitched into the fabric or by quilting layers of thick material between the layers of the shell. Historically the stuffing would be a natural material, and I urge you to do the same. When armor was stuffed, materials like un-spun wool, horse hair, and raw cotton were used. If you use the quilting method where you stitch multiple layers of fabric together, this would be accomplished by using many layers of linen or 1-2 layers of fulled wool. Interestingly the padded layers actually offered significant protection from arrows, as layered cloth is fairly puncture resistant, and raw cotton in particular seems to wind itself around the shaft of arrows that spin as they pass through the padding.  I have had success using fulled wool to pad my 16th century arming doublet. Wool serves as a very breathable layer of padding. In addition to the materials I've listed here, bamboo quilt batting also works quite well.

Depending on how you count, there are 2 or 3 different padded garments that you will want to create. The first is a garment that is sometimes called a gambeson or aketon and protects the torso. The construction of this garment is similar to the Bocksten man tunic. The second garment you'll want are padded cuisses. These cover the upper leg and also serve as a place to attach the knee cop. Building these two garments first is probably your best bet, as all of the rest of your armor will fit over top of your padding and/or will be attached to it. The third padded piece goes inside your helmet and serves as padding for your head.

Elbows and Knees:

SCA armor standards require that you protect both your elbows and knees with rigid protection. For the purposes of this suit of armor, we will accomplish this with simple elbow and knee cops that do not have any lames and does not involve any articulation. This will keep it simple and keep costs down. Making elbow and knee cops isn't particularly hard, and for many new armorers, they are their first piece, so making them is definitely an option, however these aren't usually terribly expensive pieces to simply buy either. Depending on your willingness to shape metal and your overall budget, you may consider simply buying these pieces. Once you have made or bought them, they will be attached to the sleeves of your padded gambeson and to your padded cuisses. This will help keep them in place. You will also usually need to add a strap that will go around the joint to keep the cop in place.

Wrist and Hands:

If you are planning on fighting with sword and shield, the cheapest way to protect your hands is to wear demi gauntlets (that protect the wrist and hand, but not the fingers) and put a basket hilt on your sword and shield (to protect your fingers). If you plan on using two-handed weapons (great sword, spear, polearm), you'll need full gauntlets that protect your fingers too. This gets expensive, there's really not a great way around that. Demi gauntlets are harder to make than elbows, but they're not too difficult. Getting fingers and thumbs to articulate correctly, however, is fairly tricky, so you're probably going to end up buying gauntlets.What's more is that protecting your hands is really important. It's fairly easy to break a finger in SCA combat, and since most people work with their hands, that's not really something you want. Hockey gloves are the bare minimum protection required by the rules, but they're really marginal in their protection. Fighting with them, especially sparring with pole arm or great sword while wearing them, is asking for broken fingers. Don't skimp on your hands.

Legs and Arms:

Armor for your legs and arms is optional, but highly recommended. The simplest and cheapest way of armoring these body parts is using splinted armor. Splinted armor takes the form of metal splints riveted or sewn to a leather or cloth backing. This method keeps the amount of metal shaping to a minimum and is a fairly forgiving and flexible method of armoring your limbs. As far as limb armor goes, the forearms (vambraces) are the most important part to armor followed by the upper leg (cuisses). Upper arm protection (rerebraces) are also a good idea. Lower leg protection (greaves) can also be useful. Striking below the knee does not count as a legal blow in SCA fighting, but it happens sometimes and it hurts. Splinted greaves will also improve your appearance.

Neck:

Neck protection is required. At a minimum you will need to attach a chain maille drape to your helm. However, in my opinion, this is a very poor method of protecting against thrusts which are highly prevalent on the melee field. I recommend that you also wear a gorget to protect your throat. Gorgets don't really exist in the mid 14th century, however you can make a simple gorget in the same way that you make a coat of plates. While it is inaccurate, it will aesthetically match the armor. Furthermore, if you wear a chainmaille (or leather or quilted cloth) drape from your helmet, the gorget will be hidden.

Body:

The SCA requires that you protect your kidneys with a minimum of thick leather. Some people do this using a weight lifting belt. If you have finished your gambeson, you can put on a leather belt underneath to protect your kidneys, and that will serve as sufficient armor to meet the rule requirements, but I don't recommend it. Historically the body's main protection would have been chain maille, however during the mid 14th century, coats of plates started to be worn. You can see an example of a coat of plates in the video above. Essentially this is constructed by riveting overlapping plates of metal to a leather or cloth coat. This provides rigid protection for your torso and serves as kidney protection.


Shield:

The appropriate style of shield for the mid 14th century is a "heater." Aluminum is a popular choice for making shields in the SCA because it is light, but they are also expensive to buy. Some people use street signs to make them, but this method still requires that you affix some form of edging on your shield. A more attractive, cheaper, and more attractive method is to make a bent plywood shield.

Sunday, November 10, 2013

Seam Finishing Techniques

When I made my first few outfits, something that I didn't know about (but really wish I did) was seam finishing. I was never really "formally trained" at sewing, so nobody had ever explained to me that if you didn't finish the seams of your garments that they would fall apart the first time you put them through the wash. If you've ever had this happen to you, then you'll know that this is indeed a very sad thing.

Now, there are plenty of ways to finish your seams, and I can't cover them all, but I will talk about a few common ways to do it. Some of these require extra equipment, while others work best when hand-stitching.

Serger:

Probably the easiest and most-straightforward method of finishing your seams is by using a serger. Now, you're probably thinking, "What's a serger?" Simply put, it's a special kind of sewing machine that finishes edges and they look like this:


Finishing seams with a serger basically involves running the machine around the edge of each piece of fabric before you sew them together. It really couldn't be any simpler (unless you could figure out a way to never need to thread one). Sergers also typically trim the fabric edge so you get a nice clean finish. For an example of a serger-finished edge, grab the nearest t-shirt, turn it inside out, and take a look at the seams. You'll see that they are essentially wrapped in thread. That is what a serger does. The major drawback of a serger (aside from the difficulty in threading one) is that it requires an extra piece of equipment, and they aren't exactly cheap. It is worth checking with sewers in your local group to see if one of them has a serger that they'd be willing to let you use for your project (I don't own one, but borrow my roommates when I need to use one). If you can't find a serger, you can approximate the effect by using the zig-zag stitch on a regular sewing machine. It won't be quite as strong or as neat, but you can get pretty close with careful stitching and trimming (Of course this requires you to have a sewing machine as well). 

Felling:
If you find that you lack the fancy machines necessary to serge/zig-zag stitch the edges of your garment or if you want a more medieval look, felling your edges might be for you. Felled seams often appear in canvas tents and sometimes jeans are constructed using them. Felled seams are a historical method of assembling garments and are quite strong (which is why they're used in tents). If you are sewing by hand, this is probably your best bet for most seams. Essentially they are done by having the two pieces of fabric (blue and green lines) wrap around each other as shown in the image on the right. They can be done by hand or using a sewing machine. The orange lines show roughly where the seams go when hand sewing. I like to do these by overstitching. This is shown in the image below:

For machine sewing, you can get a special presser foot to help you make them, but this is unnecessary. Unfortunately you'll find that there really isn't a way to do this without creating a visible machine stitch, which is something I like to avoid when sewing medieval clothing. However, you might find this to be acceptable, particularly for undergarments (shirts, braies, etc). Furthermore, you can create a hybrid where you do the first seam stitch with a machine, roll the felled seam over, and finish with a hand stitch (hem, overstitch, etc). 

This is another good explanation of how a felled seam works: http://www.backpacking.net/makegear/tarptent3/flatfelled.html

This is a reasonable tutorial for how to make them using a sewing machine: http://www.coletterie.com/tutorials-tips-tricks/standard-flat-felled-seam

Rolled:
Another way of finishing edges is to roll them over. This tucks the raw edge inside the roll so that it can't unravel. Rolled seam edges are shown above, and they can be carried out in a couple ways. The neatest way is to put a narrow hand-rolled hem around each piece and then sew the pieces together, but a quicker way to do it is to simply stitch your fabric pieces together, leaving a wide seam allowance (3/4" - 1.5" depending on how much fabric you need to leave yourself). Then, simply fold this seam allowance over twice, tucking the raw edge inside, press with an iron, and stitch the edge down (by overstitching, hem stitch, etc). You can also do this with a sewing machine, but like before, you'll have a visible machine stitch (unless your machine can do a blind hem stitch, but most can't). 

This is a good tutorial on doing a hand-rolled hem: http://hubpages.com/hub/How-to-sew-a-rolled-hem

For a quick reference sheet to some basic sewing stitches, look here: http://www.ia470.com/wardrobe/stitches.html

Note: What I have called overstitching during most of this tutorial is referred to as a "whip stitch" by this stitching guide. For rolling over and finishing hems, there are several stitches presented in this guide that will work just fine including the whip stitch, vertical hem stitch, cross stitch, and even slip stitch. However, you will probably find that the simpler, spiral ones are a bit faster. 

Monday, October 21, 2013

The Bocksten Man Tunic

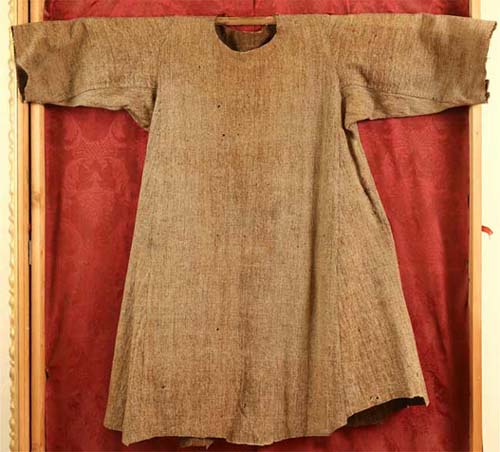
The tunic worn by the Bocksten man
The Tunic:

The first garment we will focus on for our reconstruction of the Bocksten man outfit is the tunic. The tunic worn by the Bocksten man is a fairly typical example of geometric construction, meaning that the pattern is comprised solely of geometric shapes (rather than complex curves). There are several advantages to this method. First, this method avoids wasting fabric by making use of rectangles and right triangles. Second, this method simplifies the process of patterning, as it breaks the body into component simple shapes. It should therefore be obvious that this fits our design principles of being both cost effective and simple. However, it is also a highly authentic method of construction, as geometric construction is present in archaeological finds that date back to pre-roman times and forms the basis of garments well into the 19th century. With regards to historic costuming, understanding geometric construction will serve us well not only in making medieval tunics, but also in the construction of virtually every other garment including medieval braies, chausses, hoods, dresses, and arming garments as well as shirts and other undergarments during the renaissance.

Tunics as an Undergarment:

In general, two layers of tunics or more is appropriate. Historically, an undyed or bleached white linen under-tunic would have been worn against the skin. This layer had the benefit of being more comfortable against the skin than wool and would also have been easier to wash, which would have been important considering that its proximity to the body would have meant that it would be soiled with sweat and oil. This garment does not seem to have survived the burial of the Bocksten man, which is somewhat typical, as vegetable-based fibers (like linen) are more prone to rotting than animal-based ones (like wool). The outer layers of tunics would generally have been constructed out of wool and could have been dyed fairly bright colors.

When making an under-tunic for yourself, it is reasonable to make it slightly shorter than your outer tunic and also to skip the insertion of the center gore (the triangle inserted into the middle of the front and back). I find that it takes me approximately 2 yards of 60" wide linen to do the undertunic and about 2.5 yards of 60" fabric to make the outer tunic.

Tunic of St. Francis of Assisi , also geometrically constructed
(http://www.kostym.cz/Anglicky/1_Originaly/01_Goticke/I_01_100.htm)

Geometric Construction:

One way to layout the Bocksten man tunic
(http://www.dagorhir.com/forums/index.php/topic,5902.msg77835.html)
To the medieval tailor, the purpose of using geometric construction was to waste as little cloth as possible. Fabric was expensive in the middle ages, as it all had to be made by hand. Wool, for instance, required that somebody raise sheep and shear them, that this wool be carded, spun, and woven into fabric. This fabric was then further treated by the process of fulling and was finally dyed. The production of other fabrics such as linen weren't any easier, and you can imagine the difficulty in unwinding the cocoons needed to make silk. The resulting fabric would have been rectangular in shape and would have been about 22" wide, limited by the arm span of the weaver. As a result, geometrically constructed garments are patterned primarily using rectangles and, at times, using triangles that can be formed from rectangles. The resulting patterns waste very little fabric and also allow medieval tailors to take advantage of the selvedge (finished edge of fabric that runs down both sides and that doesn't unravel). Modern technology has changed how fabric is woven, so these days we typically have 60" wide fabric to work with. This allows us to make our pieces a little wider if we need to, but really it just changes how we lay out our patterns. The image to the right demonstrates roughly how to lay out a geometric pattern for the Bocksten tunic using modern 60" wide fabric. That layout comes from a rather good tutorial on making the Bocksten tunic (link in the caption). The tutorial was posted by a user named Alric on the Dagohir forums and it provides fairly detailed instructions on the construction of the Bocksten tunic, so rather than reinventing the wheel, I'm simply going to direct you to go read that tutorial on how to make the tunic and will instead provide guidance on a few key features that I think are a little tricky or that the tutorial doesn't address well. 

The Historical Pattern:

The original bocksten tunic is a fairly simple tunic constructed from rectangles and triangles, as we've mentioned previously. The original would have had full-length sleeves and would have been long enough to reach mid-calf. You will also note that the triangular "gores" that are inset along the sides and center front and back give the tunic some added fullness. These gores seem to start around the natural waist, in contrast to the St. Francis tunic shown above, where the gores proceed all the way up to the armpit. The original was made out of medium-weight twill-woven wool. For recreating this tunic, a plain fabric or a herringbone pattern would both be good choices. In the SCA, we often use linen as a substitute for wool because it is a little bit cheaper, a little bit cooler, and a little bit easier to acquire. If you choose to use linen, I recommend a medium to heavy weight linen (5 - 7 oz) for constructing the tunic

This Site provides details on the actual pattern and pieces of the Bocksten tunic. You'll note that some of the pieces (like the right sleeve) are actually pieced together from smaller pieces. This would have been done on the original piece simply because the tailor ran out of fabric pieces large enough to make the whole sleeve, so instead he put two together, and voila! sleeve without waste. You probably have enough fabric to make this a single piece, so you can probably simplify the pattern by avoiding some of those seams. However, if you find that you need to piece fabric together in order to get a whole piece, by all means, do that, it's period.

Sleeve and gusset layout from original
If you examine the historical pattern closely, you'll see that Alric's tutorial made a few deviations from the original. First off, you'll note that Alric uses square armpit gussets where the original uses triangles. Second, you'll note that the sleeves of Alrics pattern are simple trapezoids, while the sleeves of the original are more rectangular from the shoulder to the elbow and finish with a trapezoid for the forearm. Don't worry, Alric's method is completely reasonable and falls well within the normal variation in geometric construction. However, if you look closely, you'll see that the pattern layout for the sleeves and armpit gussets could actually be cut from the same rectangle.

Another difference you'll notice is that the neck on the original Bocksten tunic is a simple oval, whereas Alric's tutorial uses a hole with a slit, forming a "keyhole" shape. Once again, both methods are reasonable and well within the variation of construction seen in medieval tunics, so feel free to use the method you prefer. Note, however, that on the original, this ends up requiring a larger neck hole (because your hole head needs to fit through it), but allows for a simpler method of neck hole finishing. I will address finishing the collar in a future post, as it is probably one of the more complicated aspects of tunic/shirt design.

Other Notes:

  • Alric's tutorial doesn't address seam finishing techniques. Seam finishing is crucial if you want to wear your garment more than once, because well, fabric falls apart after you cut it unless you do something to prevent it from unraveling. Because there are several possible methods of seam finishing and because it is important for all garments, not just this tunic, I will be posting a separate post that is dedicated solely to seam finishing techniques. 
  • Alric assumes the usage of your shoulder measurement to find the body block width. This might not work if you are on the heavier side. Instead I recommend also measuring the circumference of your chest (at the nipples) and your belly (at the bellybutton), dividing those two values in half, and using the larger of those three measurements (shoulder width, chest/2, belly/2) as figure "B" when following his pattern. 
  • Alric doesn't really mention adding seam allowances. I typically add an inch to each measurement to give me a half inch of seam allowance on all sides. If this is your first attempt at making a pattern, I recommend adding 2 inches, because it is far easier to remove material than it is to add it later. 
The next post in this series will show you how I begin making my own Bocksten tunic. I'll also be posting some tutorials on seam finishing and on finishing the collar.